

The past few weeks at the house have been all about insulation and air sealing. It’s been a busy time of stuffing wall cavities with batts and taping up our air & vapour barrier. These are things we won’t see when the house is done, but absolutely critical for how the house feels and performs. On our path to net zero, we’re taking more time and care to get the details right.
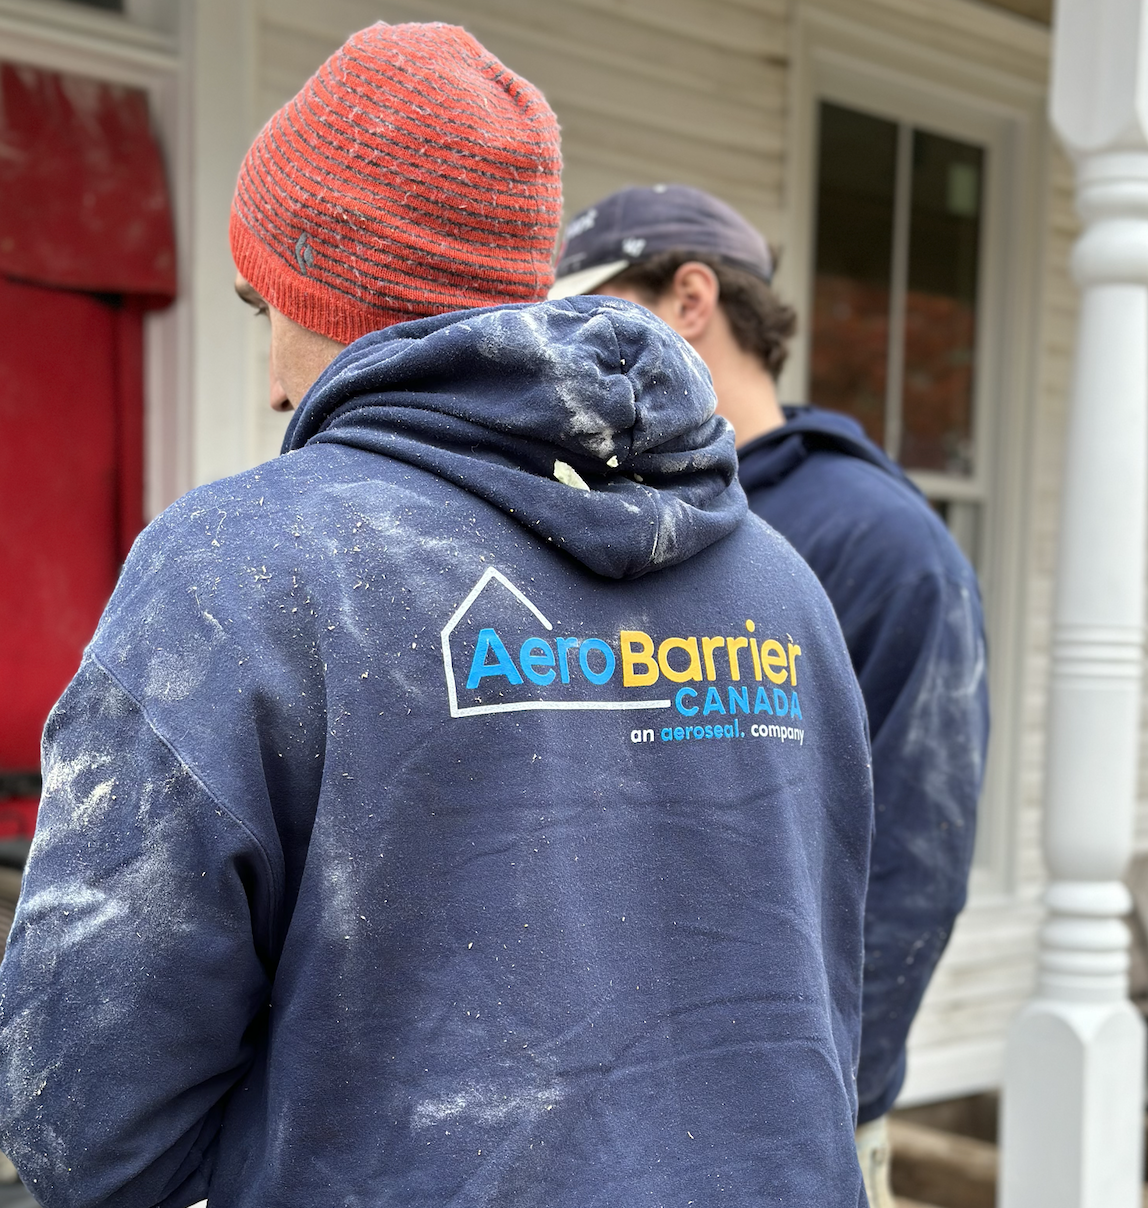
Even after the insulation and vapour barrier is done, we’ve still got one major step that’s going to dramatically improve the performance of the house – we’re going to be partnering with Aeroseal to do a whole-home air sealing application.
For someone who’s spent the better part of 4 years manually running around houses with a caulking gun trying to seal up leaky areas, I couldn’t be more excited.
Why is air sealing so important?
In any home, hundreds or thousands of tiny little openings in the building envelope add up to a LOT of air leaking from or infiltrating your home. Some of those areas include outlet boxes on exterior walls, recessed light fixtures, gaps in framing & sheathing, imperfect caulk and foam around windows, etc.
All those tiny openings can add up to a LOT. The older your house, the more likely it is that you have lots of leaks.
Those leaks have five major impacts on a house:
- Energy Efficiency: Your HVAC has to work harder to condition your space. We’ve felt this already at the house with the furnace turning on every 5 minutes, blasting to a certain temperature, and then watching that temperature drop quickly. Our bills showed it!
- Comfort: All those air leaks add up to drafts. In some cases, we could feel cold air whizzing by us in the winter near windows and doors. And that’s just what we could feel directly. Upon opening an outlet or light switch here and there, I’d feel a shot of cold air coming through the back of the box.
- Indoor Air Quality: While your nice conditioned air can escape the house (bad), the opposite can also be true (also bad!). Outdoor pollutants, allergens, and dust enter the home through tiny air pathways.
- Pest Prevention: Openings can be welcome entry points for insects and rodents. We can’t even count the number of nests, beehives, and piles of ladybugs we found when we opened the walls here.
- Noise Reduction: Leaky houses are louder, transmitting more decibels of every car, train, bus, plane, and gas-powered leaf-blower right through your walls and into your brain at exactly the moment you’re about to jump onto a Zoom call.
We first became aware of the importance of air sealing when we moved into our last house, the County House. During our pre-renovation energy audit of that 1889 home, we were shocked to hear from our energy advisor that the house had the equivalent of a 25-inch x 25-inch opening – the total area if you added up all the leaks. That total area, also called Equivalent Leakage Area (ELA) is one key indicator for knowing how well-sealed your home is. The other key indicator we learned about is Air Changes per Hour (ACH), which measures the rate at which the air within a house is exchanged with fresh outdoor air. At the County House, we were sitting near 10ACH, which was 2-3X the average house.
Learning this, we went to town trying to seal up every opening, gap, crack, hole, hatch, door, vent, light, and outlet. We were on a mission!
Lesson: Manually Air Sealing is Hard
I spent about eighteen months in the County House air sealing. It was a non-stop project. We had bulk boxes of caulk in the basement and every weekend, I’d spend a day or more dedicated to sealing up one area of the house. In our bedroom, for example, that meant:
- Opening up every outlet box and light switch on exterior walls, using caulk or fire-block foam to seal holes in the back of the box, applying a foam sealant pad, and reinstalling the cover
- Re-caulking, sealing, and calibrating all of the windows
- Caulking along the gap at all the baseboards, where we could feel air blowing in
- Removing each recessed light box and sealing the holes in the back of the box
- Heading up into the attic (through the hatch I had insulated and latched to create an air-tight seal), to install an air-tight boot over each recessed fixture below
And that was just one area of the house!
But I was determined. The more I thought about how leaky our house was, the more I set out to seal up every last hole. I was the leak hunter, and nobody could stop me.
Sarah would wake up to find me with my “air sealing clothes” on, knee pads ready, caulking tools in hand, and curse words spewing as I opened up outlet boxes and was met with a rush of cold air. It was never-ending.
![]()
Perhaps to give myself a sense of accomplishment, I began tracking data of how much I was sealing up as I went through the house. I used the 25″ x 25″ equivalent leakage area (ELA) as my baseline, and I measured – in a spreadsheet – even every 1/8th gap and crack I sealed to tally up how much of the ELA I had closed up.

You may think I’m kidding when I say I tracked our air-sealing efforts in a spreadsheet… We were determined!
We cut our air leakage by about 50% at the County House, which is a significant improvement. But it was hard!
What we’re doing differently at the new house
At the new house in Georgetown, we wanted to up our game on air sealing. Because we’ve got so much of the house opened up, it’s a once-in-a-generation opportunity to get things right. We also wanted to be more ambitious because:
- We’d like to do better than 50% improvement but without all that manual work
- Given our move to electrified heating and cooling – and eventually getting to net zero – every bit of efficiency we can eek out of the house matters!
Our energy audit here revealed that our house does 10ACH, and a reduction of just 17% to about 8.5ACH would save 25GJ of energy a year. 1GJ is enough energy to make 1000 pots of coffee, so you can see how significant an impact air sealing has on your home’s energy footprint.
But we want to go further than 17%. In fact, we’d like to get our ACH down to 4 or 5 – maybe even less – a 60% reduction! That would mean we’d reduce our energy consumption by more like 90GJ – or the equivalent of 90,000 pots of coffee made in a year.
The question, then, was: How are we going to do this?
Given our experience at the last house trying to seal things up manually, we knew that wasn’t an option. When we started asking around, the recommendation we most often received was to spray-foam everything. Spray foam sports great R-values for insulation, and people love it because it fills up all the nooks and crannies in stud bays and attic rafters to form an air and vapor barrier (although some suggest that the foam shrinks over time and loses its perfect seal).
Our stance on spray foam, however, is to use it as sparingly as possible, because:
- It’s really expensive vs. batt insulation
- It comes with all kinds of environmental and health considerations, like off-gassing and a huge carbon footprint
Manual sealing was out. The spray foam was out. Where to?
Then we met Aeroseal
It was my dad who came across another option for us to consider: Aeroseal. He had seen a demonstration on This Old House where the crew put a house under positive pressure and then sprayed an airborne polymer (like caulk in powder form) inside. The material was a safe, low-VOC, zero-off-gassing sealant – perfect for our aim to bring as few toxins as possible into the house. As the air was pushed through the home, and ultimately out of the envelope through all the little holes and cracks, it carried with it the polymer, which then adhered to itself and closed up the holes.
I couldn’t believe what I was watching. It was amazing! While the holes got sealed, the team was able to watch a graph in real-time as ACH dropped.
I was equally excited (can we do this in our house!?) and devastated (did I really just spend 18 months on hands and knees trying to do this manually?).
You can watch the video below:
One of the things about Aeroseal is that your house needs to be effectively empty to run the envelope sealing process (their duct sealing process can be done just about any time – something we also want to do in the future). Now was the perfect time for us to tackle the envelope.
We reached out to Aeroseal, explained our project, and had their team here in just a couple of days to look at the house. They said we’d be a perfect candidate!
Today, we’re so excited to announce that in just a few weeks, as soon as the drywall is done, we’re going to have Aeroseal at the house performing their envelope-sealing process in the house. And we’re going to be covering the entire process from end to end, including:
- getting ready for the sealing process
- coverage of setting up and applying the sealing
- our post-sealing ACH results!
The process will take just a day or two, with prep included. But we’re optimistic it will make a HUGE difference in the house that would otherwise have taken us years to get sealed at this level.
Stay tuned for updates here on the blog and our Instagram as we get ready for the big day!


+ show Comments
- Hide Comments
add a comment