
As the temperature has dipped over the last few weeks, we’ve been hard at work inside getting this phase of the renovation done. It has been a sprint and included many long days, often getting started before the sun is even up and wrapping up late at night.
One thing we’ve noticed? The house is super comfortable: warm, quiet, and cozy. That’s not by accident, but I’m still so pleasantly surprised when I walk into what was a drafty and freezing home last winter to find that it is perfectly toasty warm! And that’s considering that the house is now heated 100% by our electric heat pump.
How did we change the performance of the house in a way that – already – is so noticeably different? The single biggest investment we made was in air sealing. Yes, there’s a new furnace and lots of new insulation – but those things are only as effective as the conditions in which they operate, and that’s where air sealing has come in.
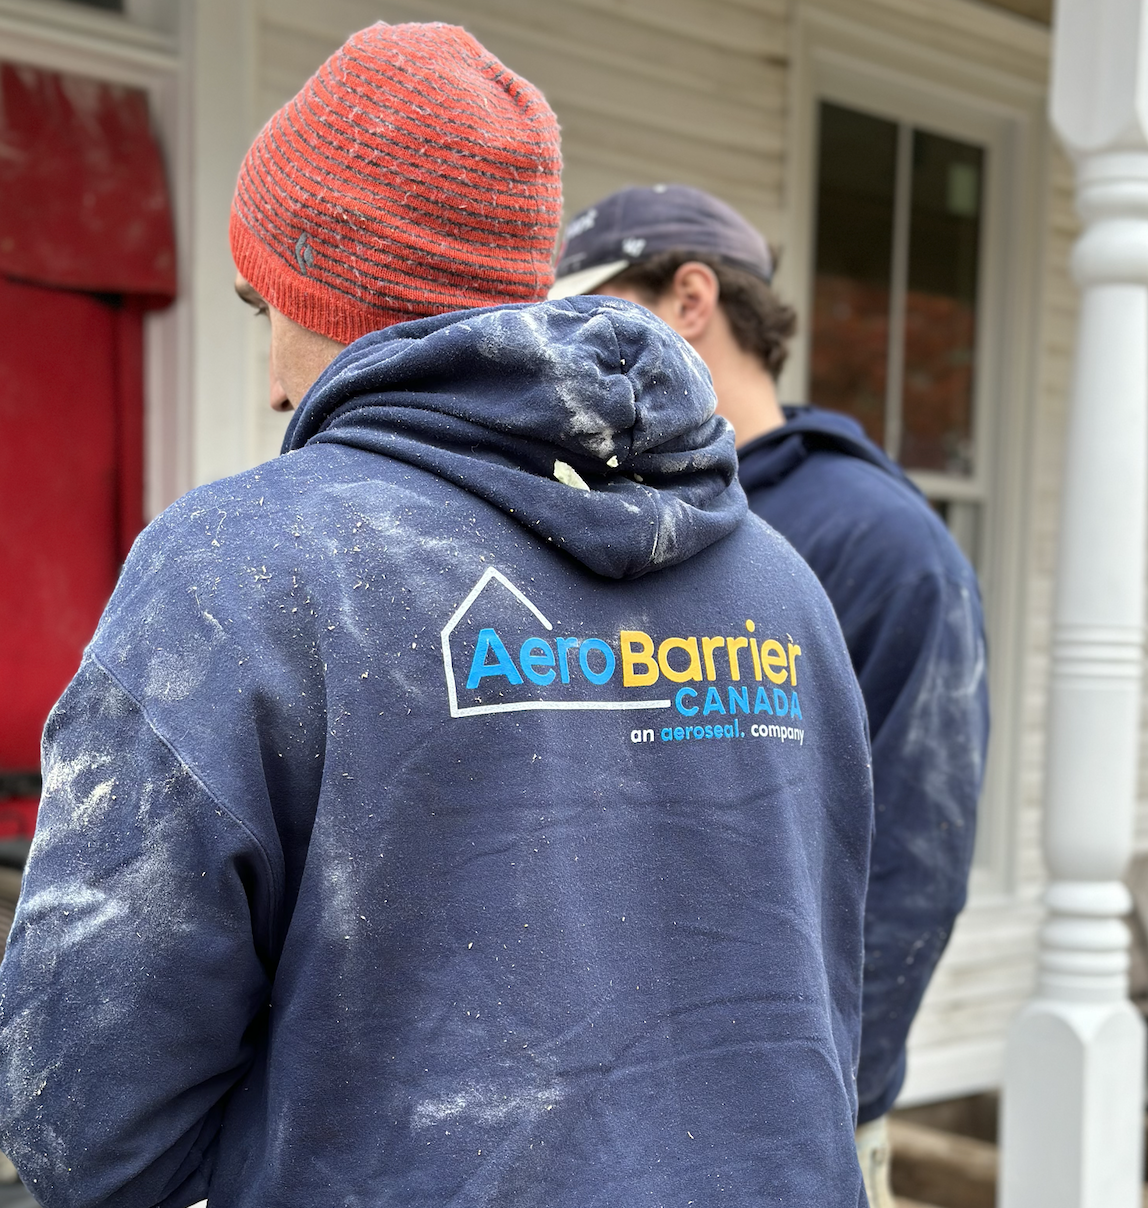
Back in September, I shared that we were partnering with AeroSeal to apply their whole-home air sealing technology – called AeroBarrier. If you’re new here, I highly recommend you go read that post first to understand why air sealing is so important and how it will impact our house.
Quick Recap: Why AeroBarrier?
In our last house, the County House, we went about combatting drafts and air leaks manually. For our year-and-a-half there, it was non-stop: caulking guns, foam, and weatherstripping were just routine parts of our weekends. While it was satisfying to know we made a big difference in the house, we knew there had to be a better way to do air sealing that significantly reduced the tedious manual effort and that would lead to even better performance.
That’s where AeroBarrier comes in. A few weeks ago, their team massively reduced the air leakage in our house in a matter of hours. Their process involves putting the house under positive pressure and, inside, spraying an airborne polymer (basically a powder version of caulk). That material follows all the air pathways blown through the house as it gets pushed through each little opening and crevice, building up until they’re all blocked.
Before we get to the results of our air sealing, I wanted to share a little about the process because it is fascinating how it all works. Here’s what happened on our air-sealing day:
Prep
The AeroBarrier crew flew through the house in the morning masking off any horizontal surfaces. They do this so that any of the sealant that lands on a surface doesn’t stick to things like moulding and window sills. Lots of comments on instagram were inquiries about whether AeroSeal can be done in an existing, finished home. The answer is yes – it just takes more prep depending on how finished your home is. If we had floors in already, for example, we would have protected and covered all of those. Becuase we didn’t, it was about stairs, trim, and windows for us.
For prep, we also masked off all the HVAC equipment and any exhaust/intake pipes that go through the building envelope (dryer vents, bathroom fans, fireplaces, etc.). Becuase we were just at the rough-in stage of our project, lots of those openings weren’t finished and sealed (for example: once hooked up to the actual dryer, its vent would be sealed and not just an open duct pipe).
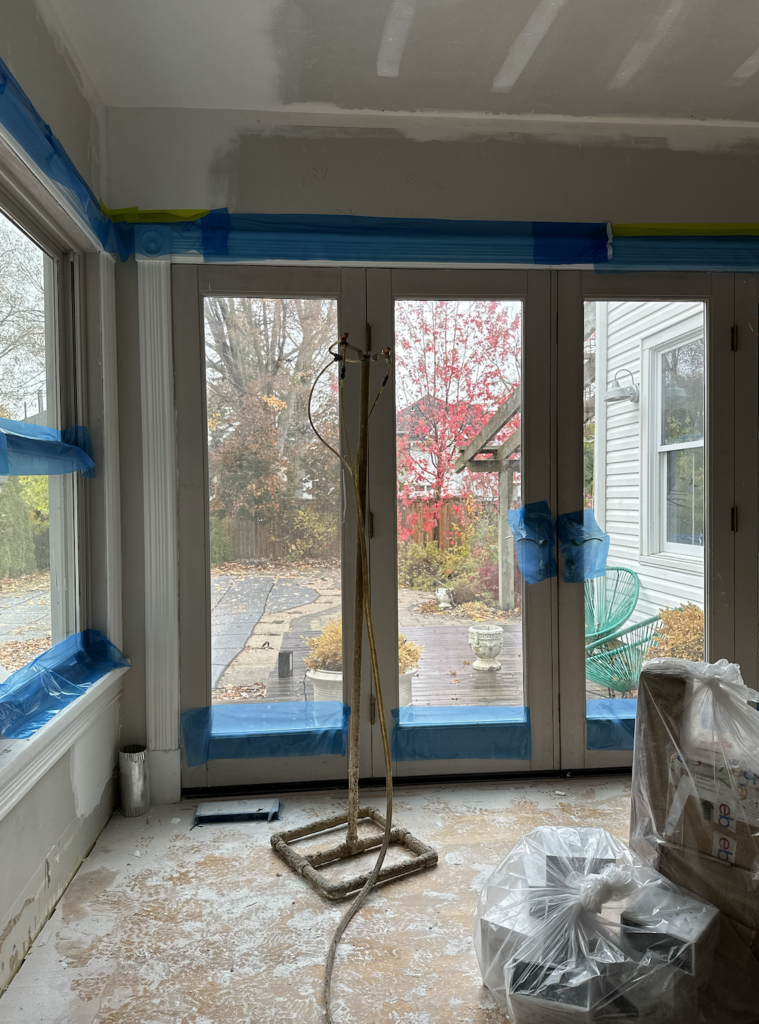
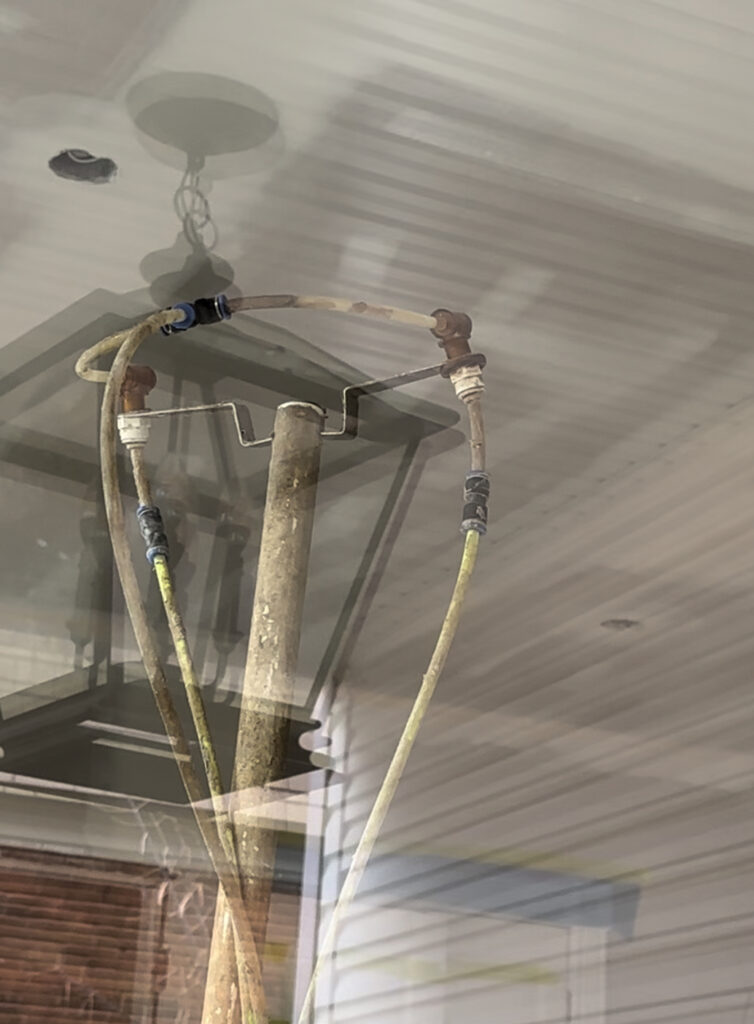
In the picture below you can see the blue masking film. You’ll also see the sprayer standing in the family room, with nozzles pointing in different directions around the room. The hose on the floor runs outside to containers of AeroBarrier sealant that would soon be pumped in and sprayed.
Spray
Once masking was done, we used the front door to install the blower kit. It seals up the doorway except for a big fan that sucks air from outside and pushes it through the house at relatively high pressure. This puts the house under positive pressure – meaning the flow of air into the house is greater than the flow of air out of the house – making the conditions right for the sealant to travel through all the openings in the building envelope. Think of blowing up a balloon with little pin holes in it. The balloon fills with air at a rate greater than it can escape, forcing the air out through the pin holes at decent pressure.
The blower fan is connected to the crew’s computer. This is like mission control for your air sealing. It’s mapping in near real-time how leaky the house is and plots a cool graph, which I’ll show down below in this post, as the house gets tightened up. It was addictive to watch!
Once it was all setup, the crew started spraying. The house got foggy and, over time, that fog built up even more as less and less of the sealant was making its way through openings (a good sign of air tightness improving).
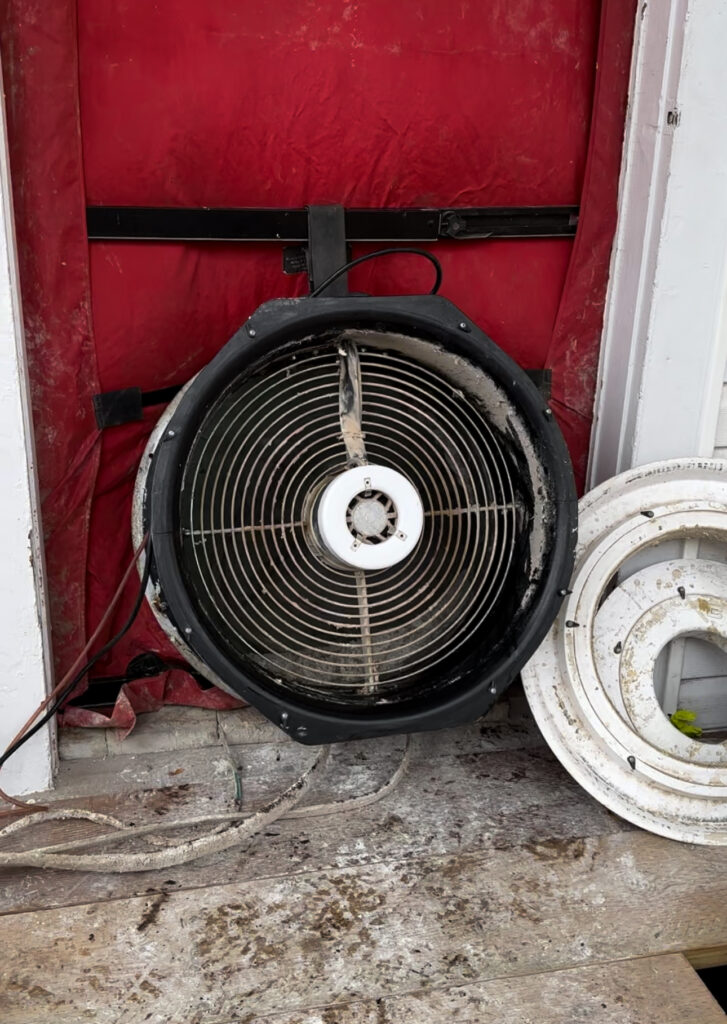
The blower door fan puts the house under positive pressure.
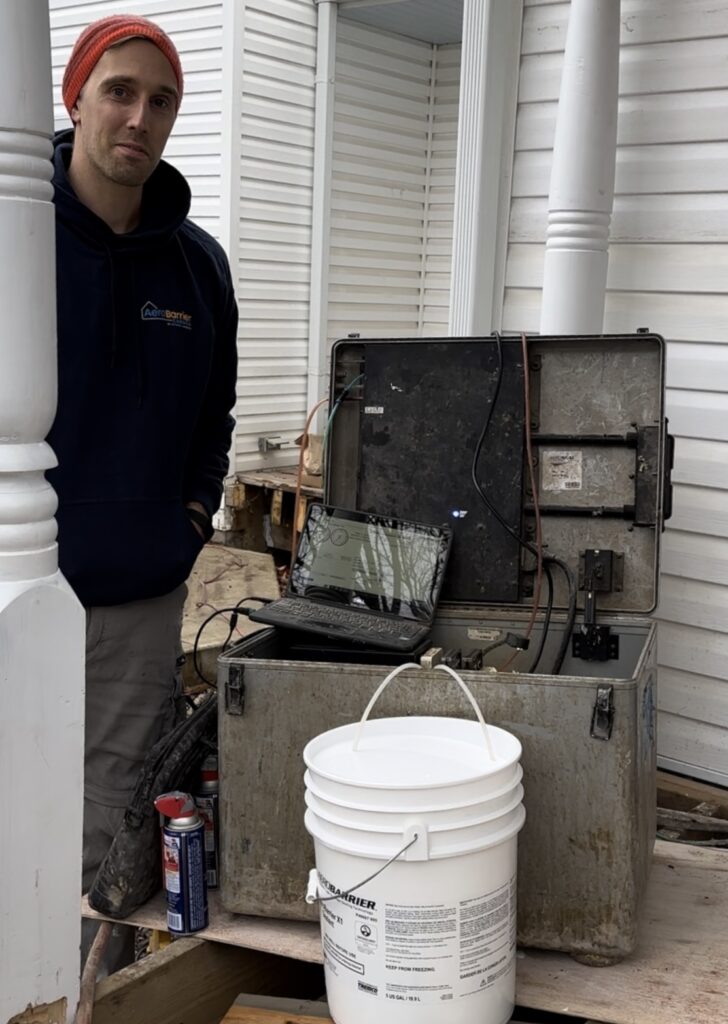
Adam standing by at AeroBarrier mission control. The computer tracks real-time indicators of air tightness and directs the flow of sealant (in the bucket) accordingly.
I took this photo from outside when the nozzles started spraying. If you look carefully, you can see the mist coming from the right nozzle.
Seal
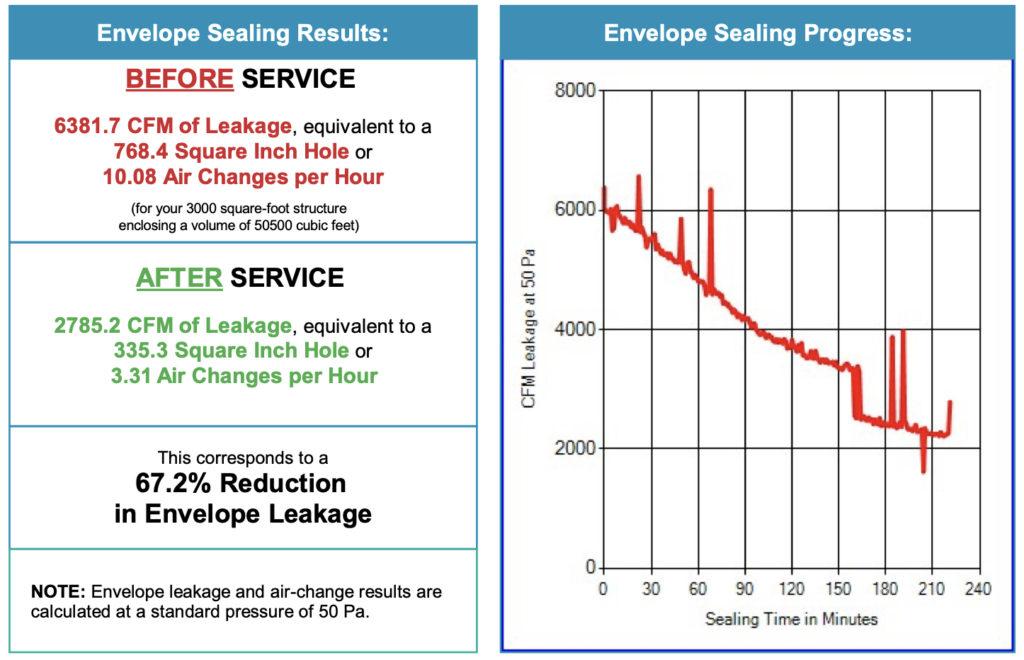
Once the sealant started spraying, we watched the house get noticeably tighter almost right away. We opened the day at around 10ach (air changes per hour). Within 30min, the house was down to about 8ach, a 20% improvement right off the bat!
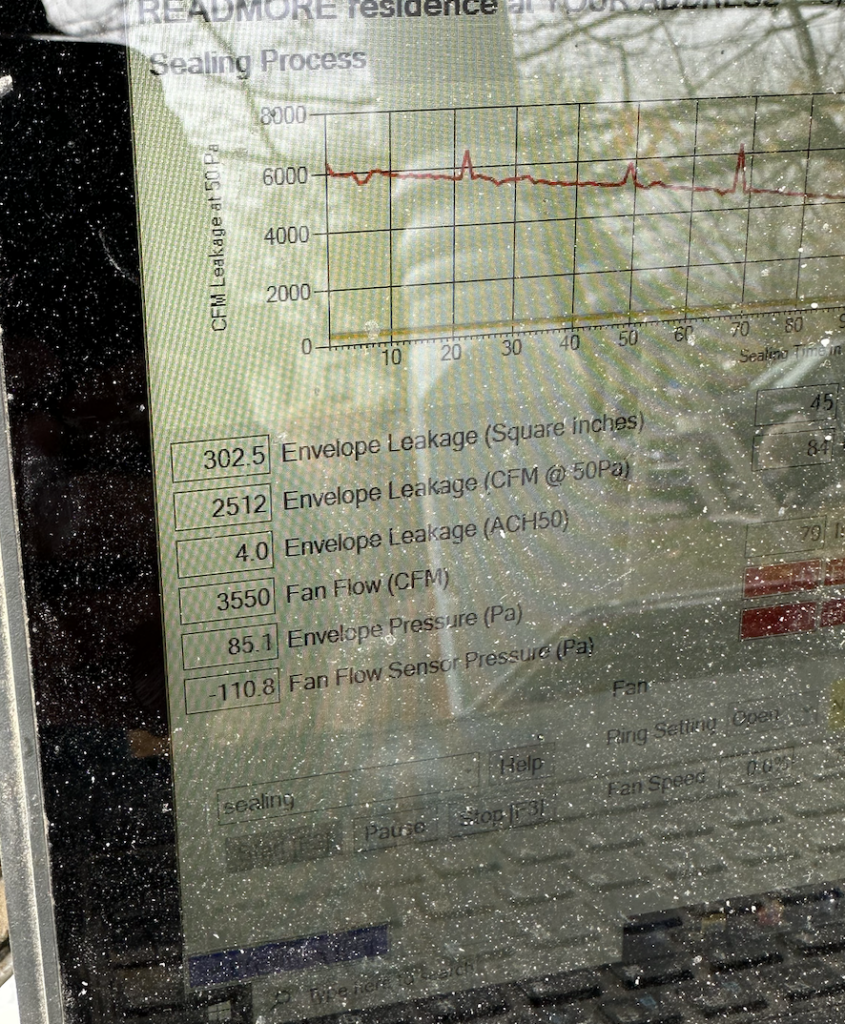
After the first 90min or so, the graph’s trajectory flattened a bit. I was worried we were maxing out, but the crew explained that this usually occurs as the low-hanging fruit areas get closed up. It was likely that some bigger openings existed – too big for AeroSeal to close up. The good news is, they’d be relatively easy to find with the sealant being sprayed and the house under the pressure.
We walked around the outside of the house and felt where air was whizzing through mortar gaps in the foundation! Bingo. The crew masked up, went inside, and closed those up manually.
Inside, the crew could also see where sealant was being directed to help identify openings we otherwise wouldn’t have found. Lots of air was escaping, for example, in areas where our air barrier wasn’t properly sealed to the floor. Or around pipes exiting the house that, to the naked eye, looked sealed but weren’t.
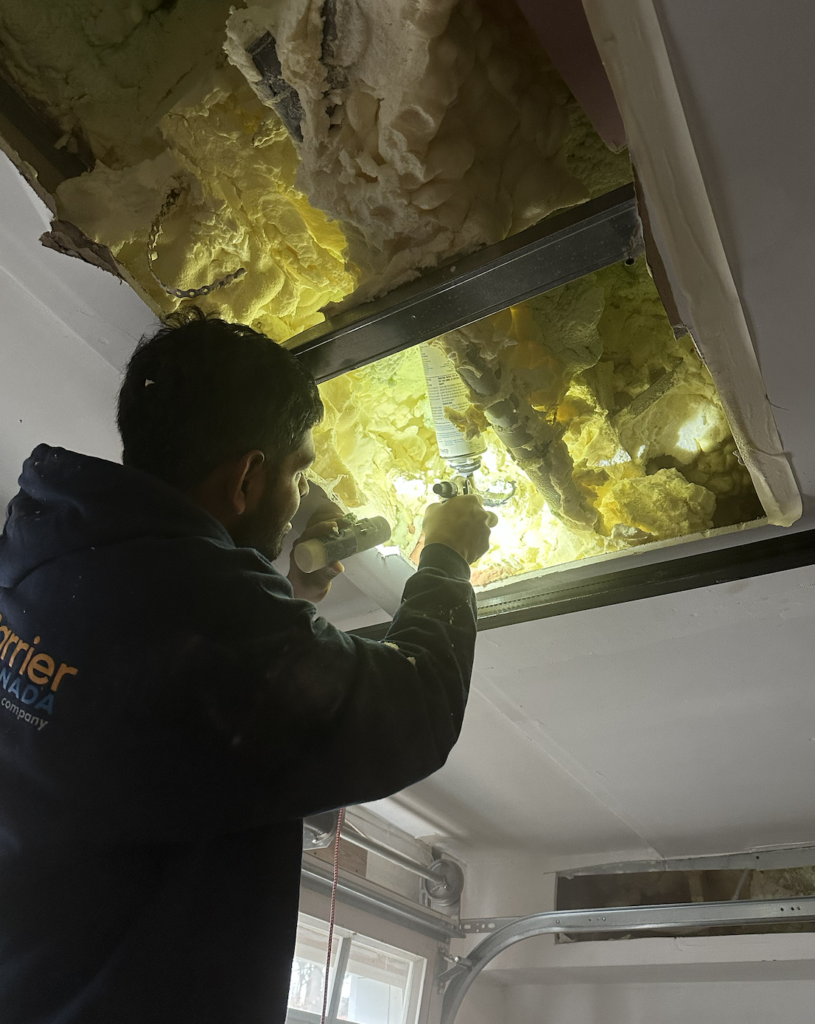
You can see a picture here of us locating a big leakage spot in the garage ceiling, just below the bedrooms/bathroom in the addition above. We noticed the garage getting foggy, a sign that sealant was leaking where it shouldn’t have been. We knew a leak was somewhere. With a little bit of investigation, we discovered that plumbing work in this area had created openings in the building envelope and hadn’t been closed up after the plumbers were done.
Every few minutes, as the crew sealed up more of these big leakage points, we’d see the graph drop a notch or two.
The result
We started the day at over 10ach. So where did we get to?
Toward the end of the sealing, when we sensed we had closed up just about as much as we could have, we had hit 3.31ach! That’s a 67% reduction in air leakage in just a few hours!
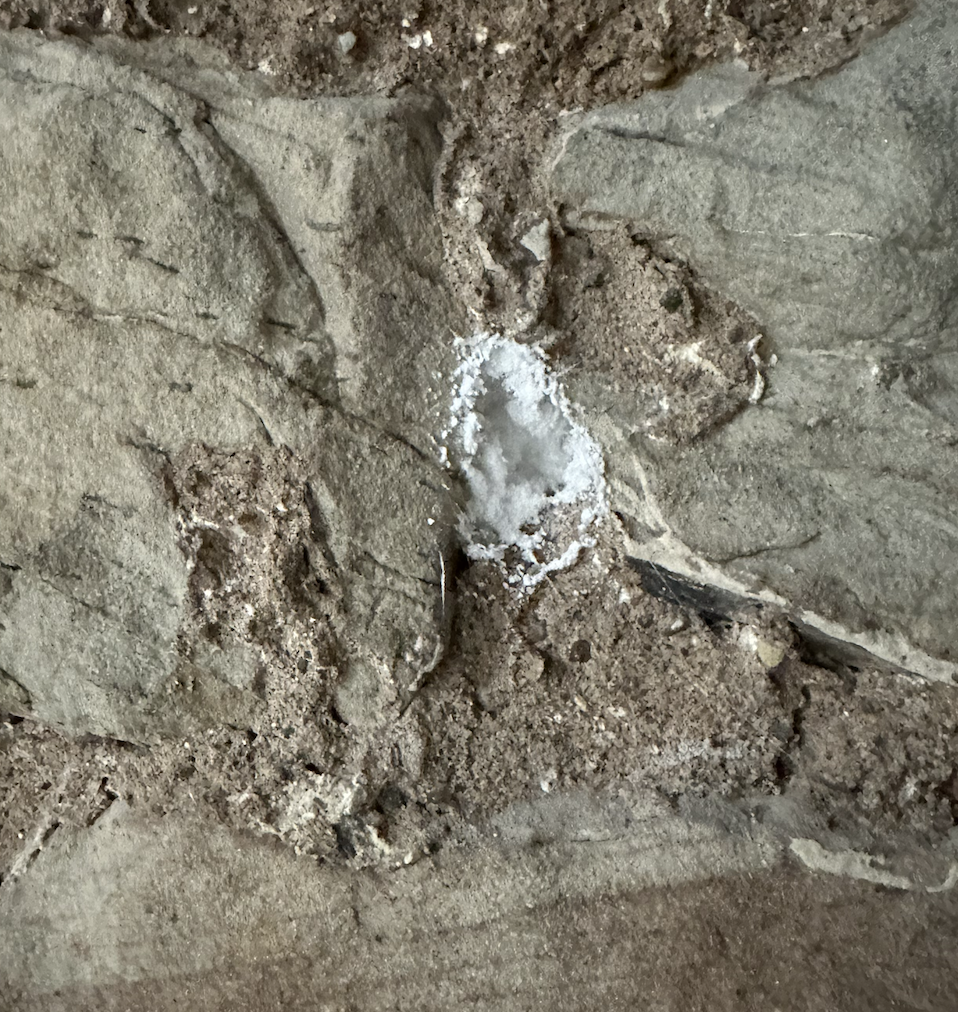
A quick walk around the house afterward showed all the areas the sealant had closed up. Have a look at the junction box below, on an exterior wall in the kitchen. The white circles in the back and sides of the box are the AeroBarrier sealant blocking up the tiny holes. And see the edges, between the metal box and drywall? Also now filled with sealant!
To think that this was happening at scale across the entire house was mindblowing.
![]()
The basement shocked me the most. Even our foundation walls – as low as a couple of feet below grade – were leaking air through the mortar! We found dozens of these sealed mortar spots down there:
And here’s where things get even crazier: in the days following the seal, I was able to find a TON of additional openings to seal up. These areas were easy to identify because I could see the sealant piled up, but each opening was just a little too big for the AeroBarrier product to create a perfectly closed seal. For example, turns out our air & vapor barrier wasn’t sealed to the floor in about 50% of the areas it was installed. So, I went around for a half-day and spot-sealed those areas.
I’m now hopeful that, given this additional sealing work, we could even be in the high 2’s for ach (pretty close to Energy Star standards – not bad for a 120 year old structure)! We’ll find out in a few weeks when we do our final post-renovation blower door test.
Either way, this is a MONUMENTAL improvement. I stuck the before and after numbers into a quick and dirty load calculator and this equates to a 30% difference in HVAC capacity for a house like ours. That’s a massive difference.
We’re going to be monitoring air quality in the house including humidity and CO2 over the next few months to assess our need for an air exchanger now that the house is so tight. That’s a great problem to have. We would much rather be in a situation of needing to bring fresh air into the house in a controlled way vs. uncontrolled (like our leaky house did before).
All in all, here are the three big takeaways from having gone through the AeroSeal process:
1- You could never do this manually
We knew we wanted a way to seal an old house without spending years manually caulking and foaming openings. We just didn’t realize that the effort could be reduced to 200 or so minutes and be done significantly better. This is a step-change in home improvement and efficiency.
2- You can see (and feel) the difference
Not only can we see all the areas around the house that have been sealed up, we can feel the difference while spending time here! Having been working in the house for the past few weeks, it is quiet and warm – even on the days when the weather dipped well below freezing.
Our new heat pump is running beautifully and I’ve also noticed that it’s rarely on. Before the air sealing and with our last furnace, we’d hear it rev up every 5 minutes and blast hot air into the house for 15min or so, then shut off for a few minutes only to repeat the cycle over and over again. The house would get to a certain temperature, only to have that temperature be compromised by air infiltration/loss very quickly.
3- AeroBarrier is the world’s best air sealing detective
One of the things I didn’t realize going into the process was just how much AeroBarrier works as a diagnostic tool. Because the sealant is visible, we can actually see where sealing has occurred, but we can also see very clearly where the sealant attempted to close up a large gap but couldn’t quite build up enough. Under the front entry stairs, for example, I noticed a TON of sealant along the bottom of the floor. When I investigated further, sure enough, cold air was whizzing right through the building envelope. I sealed up about 5 stud bays with air barrier, insulation, and caulk/foam. We never would have discovered those leakage points (big ones!) without AeroBarrier.
4 – Ductwork sealing next!
Now that the building envelope is sealed up, we’re looking forward to – at some point in the future – also applying AeroSeal’s process to our ductwork. Their duct sealing can reduce leakage by over 90%, meaning even more efficiency for HVAC systems and better/more comfortable delivery of conditioned air in rooms around the house.
Watch the video below to see a behind-the-scenes of our air sealing day!


+ show Comments
- Hide Comments
add a comment